
Sunday, February 25, 2018
Saturday, February 24, 2018
Infrared Photographs and how to get them.
Getting Infrared photographs need not be expensive. The camera I use in some of the shots was under $60 dollars. The Infrared filter was $8.00 and I'm getting a filter holder for around $7.00, so for around $75 dollars, you can get infrared images. Or, you can visit a site like https://www.lifepixel.com/shop, and either buy a high quality converted camera or have your existing camera converted. The cheapest place I've found is eBay, and I searched for "Full Spectrum Camera". The current camera I have now is a Vivitar 5200 10 megapixel point and shoot, but I've owned Sony cameras with a "Night Shot" function that was really an Infrared mode.
Light is not much different than the electricity that runs your house. The only difference is the frequency in which the energy vibrates. In the case of light, the frequency is measured in the distance between peaks of the vibration as the light travels through space. For visible light, the distance is in a range from 700 Nanometers to 390 Nanometers, 700nm being at the red end of the spectrum and 390nm the blue end. Anything just beyond 390nm is considered UltraViolet, and anything beyond 700nm is considered Infrared. Your eyes aren't normally sensitive enough to detect either Ultraviolet or Infrared under normal conditions, but a camera sensor is very sensitive to both and may extend to 1000nm depending on the camera sensor.
Converting a camera
Because our eyes are not sensitive to Infrared or Ultraviolet light, cameras have "Hot Mirror" filters that block this light so photographs look normal, otherwise, they would have a strange color cast to them. To take Infrared photographs, this filter must be removed by a person experienced in its removal. Removal of the filter does not preclude you from ever taking normal photographs again, but you will need to purchase a filter that mimics the Hot Mirror in your camera. A camera with an electronic viewfinder is also convenient since it will allow you to see what you picture will look like before you take it, but if you convert a DSLR camera you will have to check your picture after you record the image.
Thursday, February 22, 2018

Tuesday, February 20, 2018


Open up the Chanel mixer. In the Red output channel, set red to 0% and blue to 100%. Change to the Blue output channel and set Red to 100% and blue to 0%. In my case, I had to play with different percentages to get a final outcome since my white balance isn't perfect, but here is what it looks like.
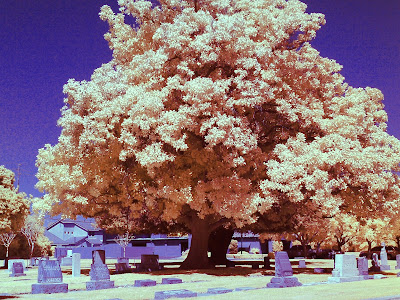
After some adjustments, this is the final image
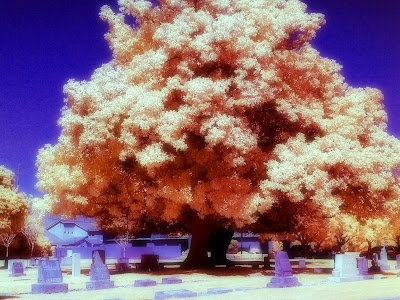

After some adjustments, this is the final image

Subscribe to:
Posts (Atom)